Tutorial #
The tutorial assumes no prior knowledge of Varv. For a deeper dive or review of specific Varv constructs check out the User Guide.
This tutorial will walk you through creating a counter using Varv. During the tutorial, you will learn some of the core concepts and features of the Varv language and some of the patterns we have found helpful for organizing and developing larger Varv applications. The tutorial will also show you how to use the Varv webstrates authoring environment.
Creating a Varv Webstrate #
We have provided a template Webstrate for creating new Varv applications which has Cauldron (a webstrates code editor) and Varv Webstrate Package Manager (WPM) packages pre-installed.
To create a new Varv application, you can click the link “Create Varv Webstrate” in the left sidebar. Once you click the link, your browser will open webstrates, and after a few moments, the URL will change to the URL of your new Varv application. You should see an edit button on the top right and the text “Successfully loaded Varv.”
If you want to save the link to create new Varv projects, you can drag the link into your bookmark bar.
Using the Cauldron Editor #
Code Fragment Basics #
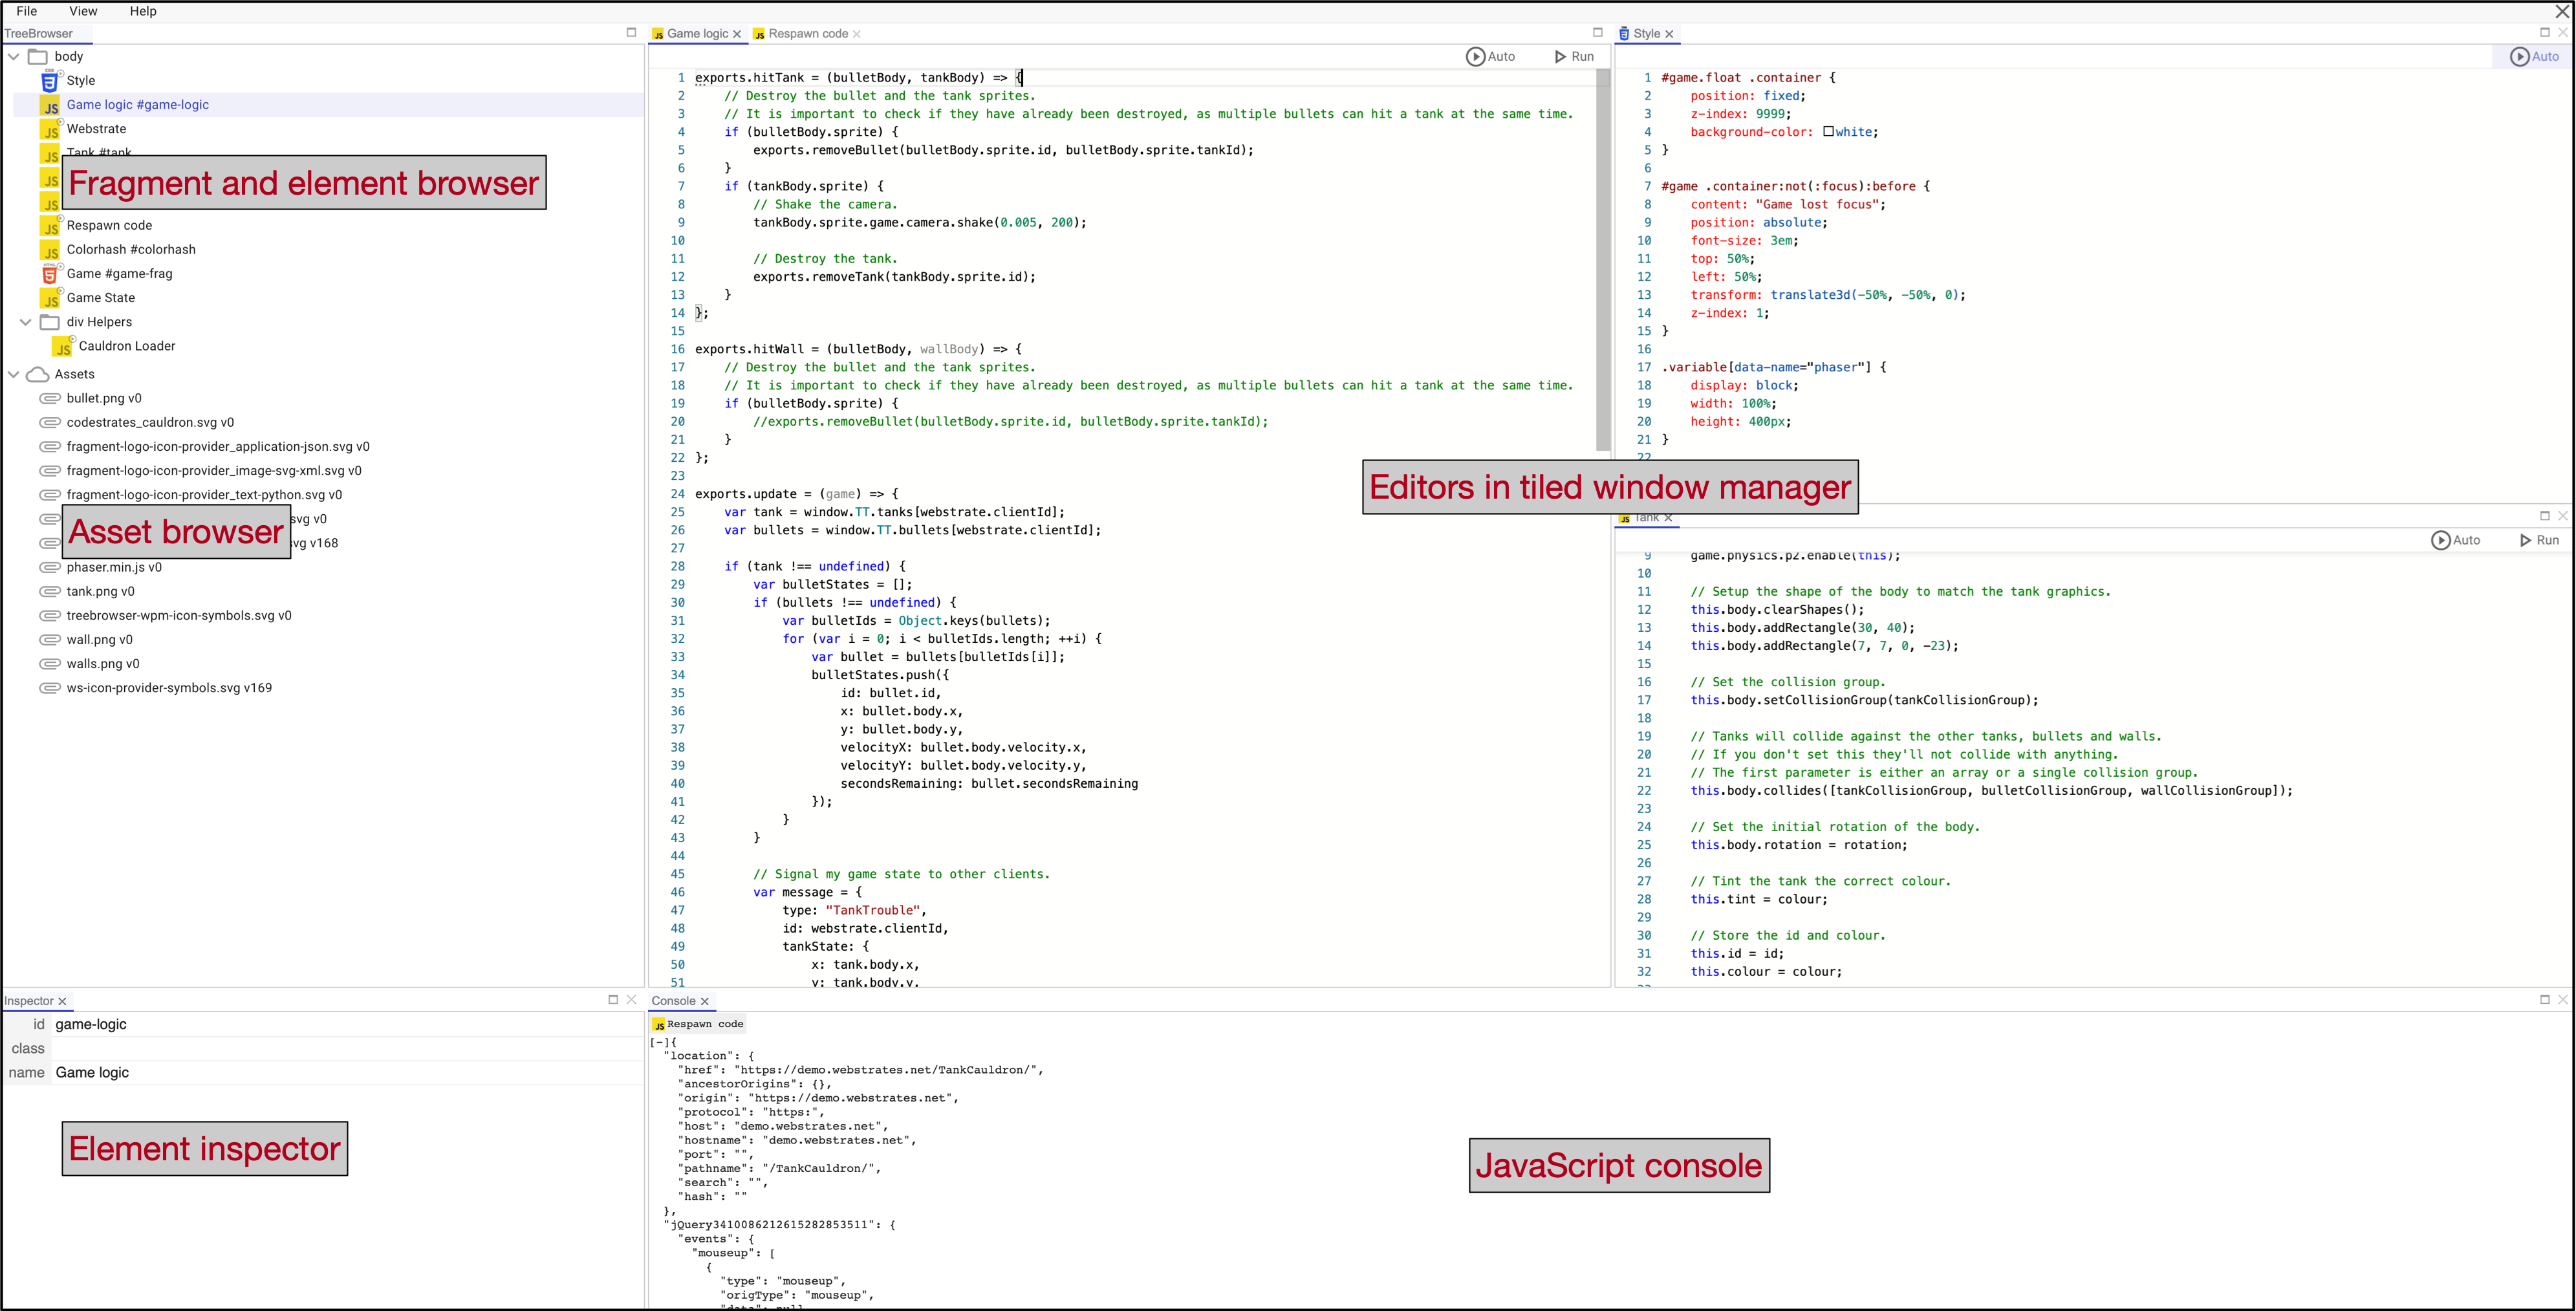
Click on the edit button to open the cauldron editor.
The tree browser on the left shows DOM elements that are synchronized between pages.
Some of the elements are code fragments, which are DOM elements with the tag name code fragment that have a data-type attribute.
The data-type describes the type of content of the fragment, such as HTML, Markdown, and JavaScript.
The default Varv application comes with a few code fragments that you can use to start developing your application:
VarvConceptDefinition: Contains definitions for the individual concepts used in your application. If you double-click this file, you will see what looks like JSON.
{
  "concepts": {
    "myConcept": {
      "schema": {
        "myProperty": "string"
      },
      "actions": {
        "myAction": {
          "when": { "click": "myView" },
          "then": [ "debugContext" ]
        }
      }
    }
  }
}
The next paragraph shows how a Varv developer might read the contents of this file. Don’t worry if you don’t understand. By the end of the tutorial, you will.
The file defines a concept called myConcept which contains a single property myProperty of type string.
The concept also defines an interaction called myAction. When you click on myView, myAction will trigger debugContext.
VarvTemplate: Contains an HTML template for rendering the concept defined in VarvConceptDefinition.
<dom-view-template>
  <div concept="myConcept">
    <button view="myView">Click me!</button>
  </div>
</dom-view-template>
The Varv engine parses the page on load and identifies all DOM nodes with the tag name dom-view-template as Varv templates.
The Varv engine then identifies concepts used by the template by looking for the concept attribute.
Finally the Varv engine instantiates the template for each concept, and sets up interactivity for the concept.
In this case the engine links the button with the view attribute myView to the trigger myAction defined earlier.
{
  "actions": {
    "myAction": {
      "when": { "click": "myView" },
      "then": [ "debugContext" ]
    }
}
If you click on the button, you will see an object containing the debugContext for the action logged in the browser console.
ContextDebug
  Contexts: [{…}]
  ActionArguments: {}
  SavedVariables: undefined
  forEachContext:
    {variables: {…}, target: 'concept57b18d140f8709bf4b74'}
The output of this action can be useful for debugging larger Varv applications.
Summary
There isn’t a lot of code in these fragments, but we’ve covered a lot.
- We introduced Cauldron, a code authoring environment built on top of webstrates.
- We introduced code fragments which are DOM elements that contain code.
- We saw our first Varv Concept Definition, which we will use in the following sections to create Varv applications.
- We saw our first Varv HTML Template which the Varv engine uses to render Varv concepts.
You can drag the top bar to move the editor around and resize the editor using the drag handles on the editor borders.
You can also append ?edit to your URL to open the editor in edit mode with a full screen editor.
Adding and Running Code Fragments #
Now we’ll try writing our first code fragment. Try right-clicking on the body in the tree and selecting “Insert Fragment” > “HTML”. In the new fragment, try pasting the following Varv template definition.
<dom-view-template>
  <div concept="myConcept">
    <h2>My Concept Template</h2>
  </div>
</dom-view-template>
Based on the explanation in the previous section, we might have expected that the Varv engine would recognize the template based on the dom-view-template tag and the concept attribute and render the concept again on the page.
But there is nothing new on the page!
This is because in codestrates we can control which code fragments are executed and which are not.
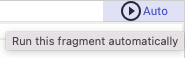
To enable the new fragment press the Auto button on the top right of the page.
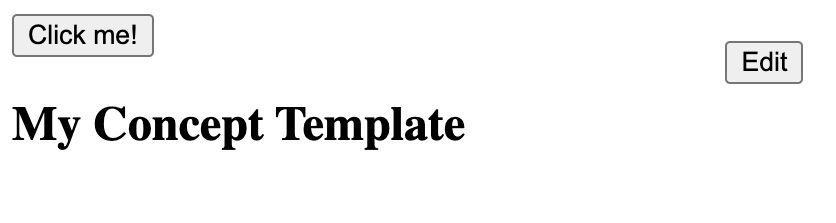
Now you should see the new template rendered on the page.
If your code fragment does not seem to be working, remember to check that the fragment is running.
Running code fragments have a small play indicator in the top right corner of their icons in the tree browser.
You can also right click on DOM elements with a folder icon in the tree browser, such as the body and select “Enable/Disable Autorun Recursively” to enable or disable autorun for all code fragments in the subtree.
Renaming and Organizing Code Fragments #
Now that we’ve created a new code fragment, lets give the fragment a nice name.
Click on the HTML Template in the tree browser.
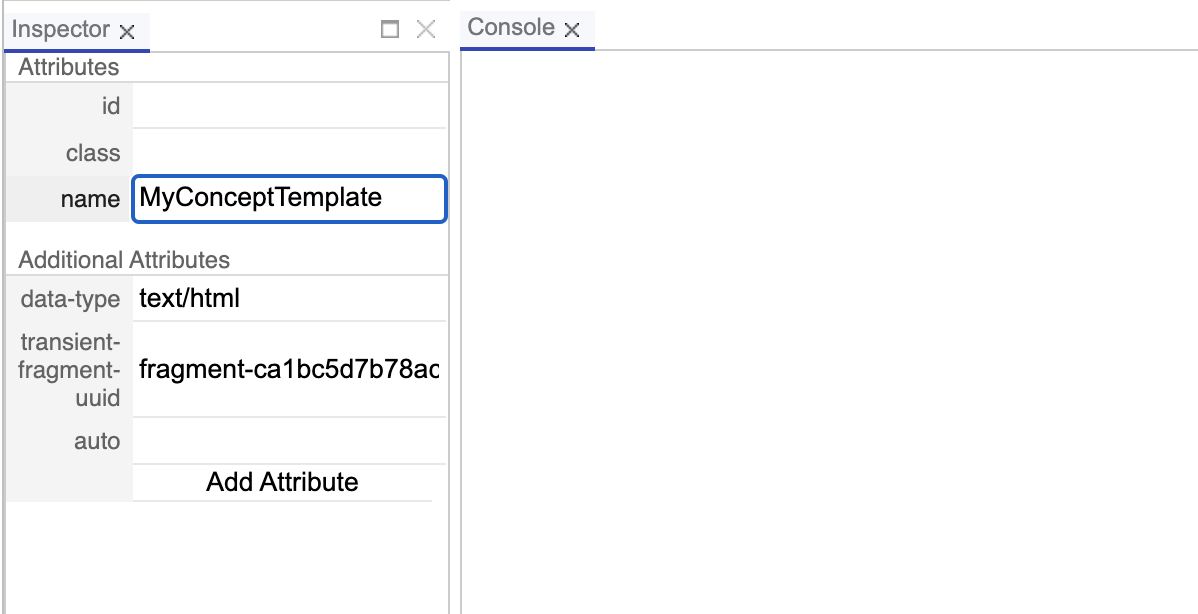
Directly below the tree browser is the Inspector which can be used to set attributes of the DOM node associated with the fragment.
Try changing the name attribute to MyConceptTemplate.
If you look above in the tree browser the name is changed there as well.
You can use the name attribute to control the name of code fragments in the tree browser.
Now try right-clicking on the body DOM node in the tree browser and select insert DOM element.
In the popup that appears type div.
You should see a div DOM element appear in the tree browser that looks like a folder.
Try giving the div a name by setting its name attribute in the inspector to templates.
Now you can drag and drop the MyConceptTemplate code fragment into the folder.
You now have all the tools you need to be able to organize code in Cauldron!
Creating a Counter #
Now that you know how to create and edit Varv webstrates with cauldron lets build a counter:
- Create a new webstrate by clicking the Create Varv Webstrate link in the sidebar.
- Rename
VarvTemplatetoCounterTemplateby changing itsnameattribute in the inspector. - Rename
VarvConceptDefinitiontoCounterAbstract - Create a new concept definition called
CounterConcreteby right clicking on the body and selecting “Insert Fragment” > “Concept Definition”- Make sure to select Auto Run on the new concept definition!
In Varv it is often useful to separate the definition of application logic, for example storing and changing the count, from interaction logic, for example incrementing the count when the user clicks a button. If we create this separation of concerns, we can use the same application logic across multiple applications or application prototypes, while assigning each application its own interactions and views. In Varv we call files with no knowledge of interactions or views “Abstract” and files that bind interactions are called “Concrete.”
Defining the Abstract Counter #
Our abstract notion of the counter consists of two things. We need a way to store the current count, and we want to be able to increment the count. We can accomplish both of these goals by defining a counter concept. Concepts contain “schema” and “actions.” The “schema” defines the shape and type of data associated with the concept, in this case the current count. The “actions” define when the concept’s data should change, and how the concept’s data should change.
We’ll start by writing the “schema.” Every Varv file uses the same basic structure. A top level “concepts” property contains an object of concepts keyed by their name. Each concept contains a “schema” and “actions” property and the “actions” property contain an object of actions keyed by their name. If that sounds complicated don’t worry about it. After writing one or two concept definitions it will make sense.
{
  "concepts": {
    "conceptName": {
      "schema": {
        // schema omitted
      },
      "actions": {
        "actionName": {
          // action omitted
        },
        "anotherActionName": {
          // action omitted
        }
      }
    },
    "anotherConceptName": {
      // omitted
    }
  }
}
We’ll define a “counter” concept in the CounterAbstract code fragment which has a schema containing the current count stored as a number.
{
  "concepts": {
    "counter": {
      "schema": {
        "count": { "type": "number", "default": 0 }
      }
    }
  }
}
The “schema” is very similar to JSONSchema.
Now we’ll create the second part of our abstract concept, an action which increments the count. Actions are objects with two properties “when” and “then” each containing arrays. They can be read as “when” any of the events in the “when” array occur, “then” perform the actions in the “then” array, potentially transforming the concept data. We can omit either the “when” or the “then” part to create actions that encapsulate events and data transformations respectively. In this case we will only define the “then” part to increment the count. Later we’ll use this action in the “concrete” file and bind the action to an interaction.
{
  "concepts": {
    "counter": {
      "schema": {
        "count": { "type": "number", "default": 0 }
      },
      "actions": {
        "incrementCount": {
          "then": [
            { "increment": { "property": "count", "by": 1 }}
          ]
        }
      }
    }
  }
}
Defining the View #
Lets redefine our template to display the counter.
We’ll show the current count and add an increment button, although we still need to bind the increment button in our concrete definition.
Replace the code in CounterTemplate with the following.
<dom-view-template>
  <div concept="counter">
    The current count is {count}
    <button view="incrementButton">Increment</button>
  </div>
</dom-view-template>
The dom-view-template specifies that this is a Varv template.
The concept attribute specifies that this template should be used to display counter concepts.
We use bracket syntax,{count}, to render properties, in this case rendering the count property.
We provide a name for our button, incrementView, so that we can reference this button later and bind events to it.
Creating Concept Instances #
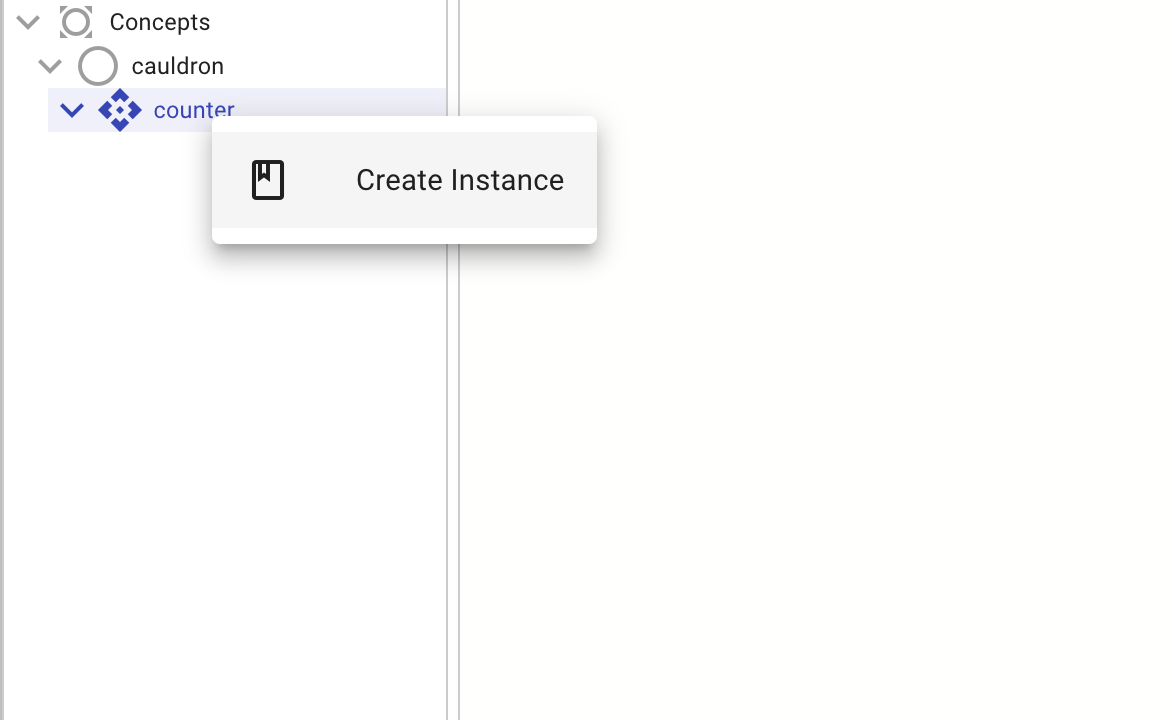
We’re almost done but we need to create an instance of the counter concept. In the TreeBrowser you can see all of the concepts defined in the current Varv program under “Concepts”. Select “Concepts” > “Cauldron” > “counter” then right click on “counter” and select “Create Instance.”
The new counter instance is immediately rendered using the template.
Debugging and Modifying Concept Instances #
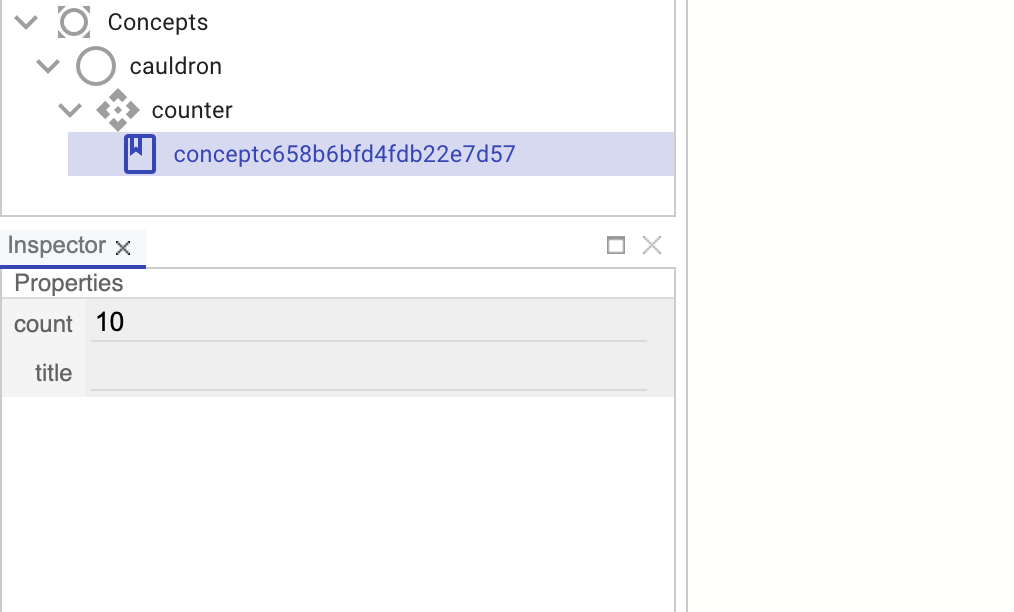
Underneath “counter” you should see an instance of the counter concept. If you click on it the “inspector” displays the properties associated with the counter. Try changing the count, and you can see the count update in the view. When the concept instance is focused in the tree browser, cauldron highlights associated DOM elements in blue on the left. Using these two tools you can identify which DOM elements are generated from concept instances, and inspect and change data associated with concept instances.
Adding Interactivity #
Now we will add interactivity to our counter.
Add the following code in the CounterConcrete fragment.
{
  "concepts": {
    "counter": {
      "actions": {
        "incrementOnClick": {
          "when": [{ "click": "incrementButton" }],
          "then": ["incrementCount"]
        }
      }
    }
  }
}
We define a new action “incrementOnClick” which says “when the user clicks the increment button then increment the count.”
Notice how we were able to add interactivity to the counter without touching the counter code. This may not seem important yet, but the ability to extend concepts through accretion, is extremely powerful. It enables the incremental development and evolution of Varv programs, one feature at a time, and means that all Varv programs are inherently extensible because extensibility is built into the language.
Adding Additional Functionality #
Our counter is fairly simple, but now that we have created it, we can extend our counter with additional functionality. Lets try adding a title to our counter.
First we’ll reorganize our code fragments by feature.
In the tree browser, right click on the body element, insert a div DOM node and name it base.
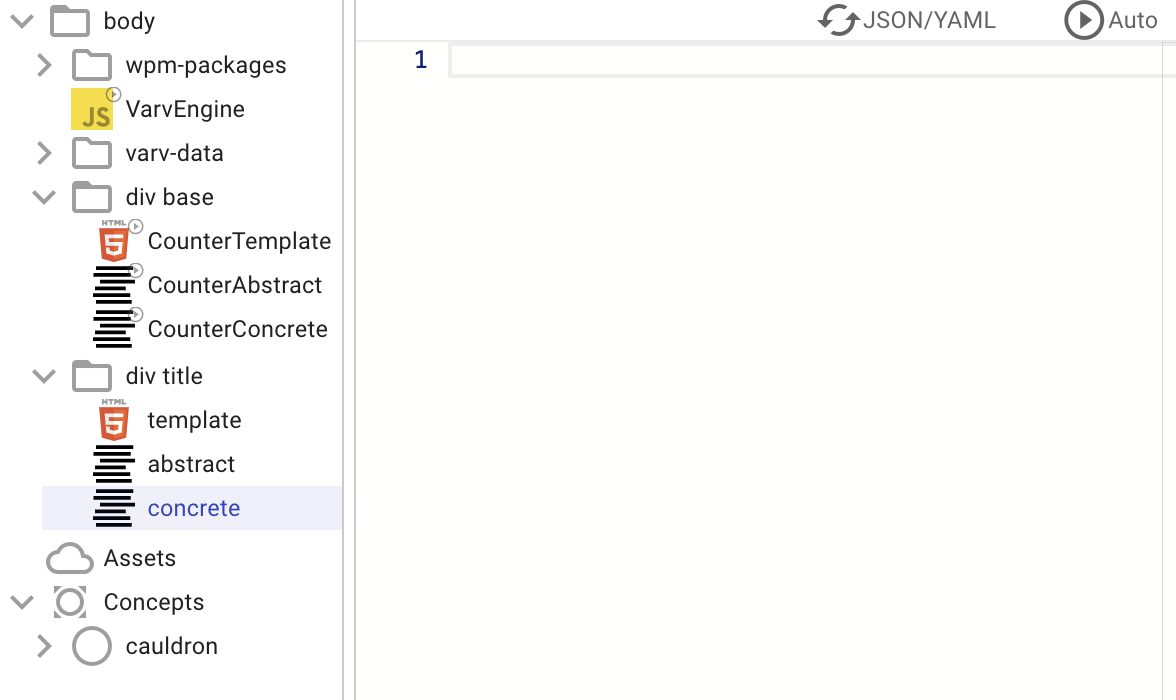
Then drag the CounterTemplate, CounterAbstract, and CounterConcrete files into the base node.

Now right click on the body and create a new div DOM Element called title.
In the title div add an HTML fragment called template, and two concept definition files called abstract and concrete.
Finally, right click on the title div and select “Enable Autorun Recursively.”
You should end up with the following structure.
Extending the Abstract Schema #
In order to display a title we have to add a title property to the counter’s schema. Try adding the following code to the new “abstract” file contained in the title div.
{
  "concepts": {
    "counter": {
      "schema": {
        "title": "string"
      }
    }
  }
}
This code extends the base concept definition’s schema with a new property title of type string. If you select the “counter” instance in the tree browser you can see the Inspector displays a title property.
If you don’t see the title property in the inspector, make sure you enabled autorun on all your new code fragments.
The easiest way to do this is by right-clicking on the div title DOM element in the tree browser and selecting “enable autorun recursively”.
Defining a New Template #
Now we want to display the title and be able to edit it.
Add the following code to the template file in div title.
<dom-view-template>
  <div concept="counter">
    <input value="{title}" />
    {count}
    <button view="incrementButton">Increment</button>
  </div>
</dom-view-template>
You should see a second counter appear with an empty input element. Try changing the title in the input element or select the counter instance in the tree browser and change the title using the inspector’s properties view. Notice how the title is synced.
Overriding the Old Template #
You may have noticed that while we added a new feature, we are now seeing “two” copies of our counter instead of one. There are two ways to get around this. You could disable the old counter template by right clicking on it and selecting “disable autorun” or you could use “template refs” to implement override semantics.
We’ll showcase the use of template-refs so that you can really see the power of incremental development. Right click on the body and insert an HTML code fragment called “app.” Set the fragment to auto run and change the contents to the following.
<dom-view-template>
  <template-ref template-name="counter"></template-ref>
</dom-view-template>
The Varv engine reads this code and creates a “slot” for a template.
When the Varv engine finds a varv-template node with a name attribute equal to counter then it will replace the template-ref with the contents of the varv-template.
Now wrap the contents of the base Counter Template in a varv-template with a name attribute equal to counter.
<dom-view-template>
    <varv-template name="counter">
        <div concept="counter">
            The current count is {count}
            <button view="incrementButton">Increment</button>
        </div>
    </varv-template>
</dom-view-template>
Finally wrap the contents of the title template in a varv-template as well.
<dom-view-template>
  <varv-template name="counter">
    <div concept="counter">
      <input value="{title}" />
      {count}
      <button view="incrementButton">Increment</button>
    </div>
  </varv-template>
</dom-view-template>
Now you should see a single counter. Using template-refs you can write views that other users can override. In the future, we may create syntax which allows accretive merging of views, but for now template-refs are the primary mechanism for creating extensible views.
Toggling the Title #
As a last exercise try right clicking on div title and select “Disable autorun recursively.”
You should see the base counter appear without a title.
If you look at the counter instance in the inspector, the title does not appear in the properties anymore.
Now try right clicking on div title and selecting “Enable Autorun Recursively.”
Your new template appears with the title property set.
This showcases Varv’s ability to support feature-at-a-time development. Now that you have set up the ability to override views, you can try extending the current code to support a decrement button, or an “increment by” input.
Read More #
As you develop larger Varv applications, make sure to check out the Varv Documentation which documents Varv’s growing standard library of built in actions and triggers, as well as the User Guide which provides a deeper look into the Varv language.